
If you're a beginner looking to dive into the world of surface mount soldering, you've come to the right place. Surface mount soldering can be intimidating at first, but with a step-by-step approach, you'll be able to master the technique and create clean, reliable solder joints. In this tutorial, we'll walk you through the process in easy-to-understand steps, so let's get started!
Surface mount soldering, also known as SMT (Surface Mount Technology) soldering, is a method used to attach electronic components to printed circuit boards (PCB). In contrast to through-hole soldering, which involves inserting components through holes on the PCB, surface mount soldering involves soldering components directly onto the surface of the board.
Surface mount components are typically smaller and have flat leads or metal contacts called "pads" on the bottom. These components are placed onto the PCB and soldered to the corresponding pads using a soldering iron or a specialized soldering station.
SMT (Surface Mount Technology) and SMD (Surface Mount Device) are two terms commonly used in the electronics industry, specifically in the context of soldering. While they are related, they refer to different aspects of surface mount technology.
SMT (Surface Mount Technology) refers to the overall process of mounting electronic components onto the surface of a printed circuit board (PCB). It encompasses the entire assembly process, including component placement, soldering, and inspection. SMT involves the use of surface mount components, which are smaller, flat-leaded components designed to be directly soldered onto the surface of the PCB.
SMD (Surface Mount Device), on the other hand, specifically refers to the individual electronic components themselves. SMDs are the small components, such as resistors, capacitors, integrated circuits (ICs), and other active and passive devices that are designed for surface mounting. These components have leads or contacts that are designed to be soldered directly onto the PCB's surface.
Step 1: Gather Your Materials:
Before beginning any soldering project, it's essential to have the right tools and materials. Here's a list of items you'll need:
Soldering iron with a fine tip
Solder wire (preferably lead-free)
Flux (to help the solder flow smoothly)
Solder wick or a desoldering pump (for removing excess solder)
Tweezers (for holding small components)
Helping hands or a PCB holder (to secure your workpiece)
Associated products: soldering iron stations
Step 2: Prepare Your Workstation:
Ensure you have a clean and well-lit workspace. Remove any flammable materials from the vicinity, as soldering involves high temperatures. Place your PCB (printed circuit board) on the PCB holder or secure it using helping hands for stability during soldering.
Step 3: Apply Flux:
Apply a small amount of flux to the solder pads on the PCB. Flux helps remove oxidation and ensures a clean and reliable solder joint. Use a fine brush or flux pen to apply it precisely.
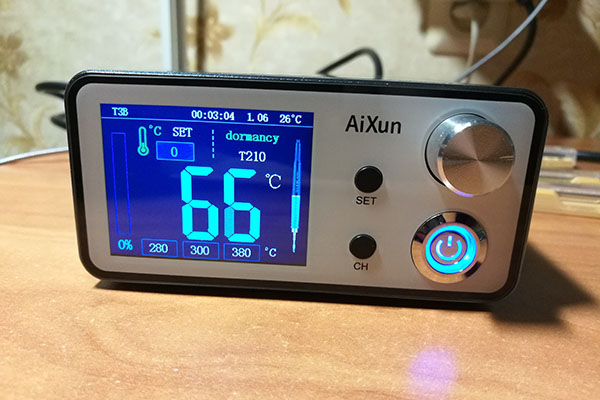
Step 4: Heat the Soldering Iron:
Plug in your soldering iron and allow it to heat up. Wait for it to reach the optimal temperature, which is usually around 350-400 degrees Celsius (650-750 degrees Fahrenheit). Make sure to follow the manufacturer's instructions for your specific soldering iron.
Step 5: Tin the Soldering Iron Tip:
To enhance heat transfer and ensure smooth soldering, "tin" the soldering iron tip. This involves coating the tip with a thin layer of solder. Melt a small amount of solder onto the tip, then wipe it on a damp sponge or brass wire cleaner to remove any excess.
Step 6: Position the Component:
Using tweezers, carefully place the surface mount component onto the fluxed pad on the PCB. Ensure it aligns properly with the solder pads and any markings on the PCB.
Step 7: Heat the Joint:
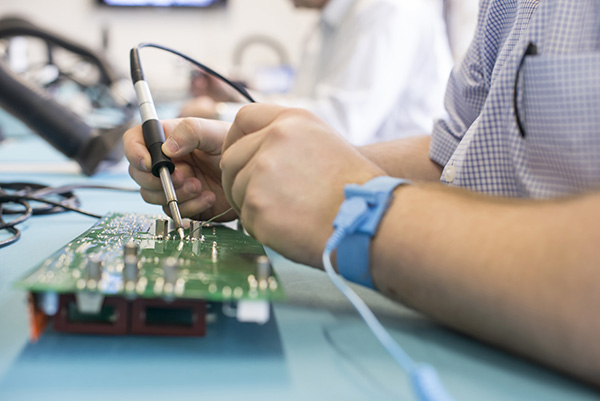
With one hand holding the soldering iron and the other hand holding the solder wire, bring the soldering iron tip in contact with the pad/component joint. Apply gentle pressure to create good thermal contact, allowing the joint to heat up.
Step 8: Feed Solder:
Once the joint is heated, touch the solder wire to the pad/component joint, not the soldering iron tip. Allow a small amount of solder to flow onto the joint. Ensure that the solder flows evenly and creates a shiny, cone-shaped fillet around the joint.
Step 9: Inspect and Clean:
After soldering a joint, inspect it visually. Check for any solder bridges (unwanted connections between adjacent pads) or incomplete solder joints. Use solder wick or a desoldering pump to remove excess solder if necessary.
Step 10: Repeat and Practice:
Continue with the remaining surface mount components, repeating the process for each joint. Take your time, practice your technique, and remember that practice makes perfect. Over time, you'll become more comfortable and proficient in surface mount soldering.
Surface mount soldering may seem daunting, but by following this step-by-step tutorial, you can gain confidence and develop the necessary skills. Remember to work in a well-ventilated area, take safety precautions, and always double-check your work
 WhatsApp